HOW TO CUT WALLPAPER CORRECTLY
You've prepared everything and you're ready to dive into installing your new wallpaper, and you want to see how the new style of the room will look. One of the most important processes is cutting the wallpaper, as it will be the key for the pattern to fit perfectly and the visual feel to be what we want.
To ensure you have no doubts, today we want to show you the necessary steps to cut the wallpaper and achieve the best result. Take note of all the tips and you will be ready to get to work.
Steps to cut the wallpaper in the best way
We are sure that you have already measured the wall in your room several times, but it is necessary to do it again, at least to avoid doubts. Do this at several different points, as there may be variations. Take the highest part as a reference and add about 5 centimeters above and another 5 below, to be on the safe side.
When you have a clear idea of the total surface to be covered with wallpaper, you may want to know how many strips you will need. For this, you will not only have to take into account the height and width of the wall, but you will also need to add an extra for the pattern of the wallpaper (if applicable).
In the labeling of the wallpaper, you will find two very necessary pieces of information to take all this into consideration: the width of the paper and the pattern repeat itself. With this information, you will have all the details regarding the measurements to know how many strips you will need.
Determines the start of the repeat pattern
Now that you know how many strips you will need, you must finalize the start of the pattern before you start cutting the wallpaper (if you have it). This will be important to ensure that the optical effect of the entire composition is correct, as you will avoid ending up in the middle of the pattern or with a cut in the wrong place. This way, you will have a great result when you finish.
Hold the roll directly against the wall, or ask an assistant to hold it so you can see it with space. We recommend making this check in the center of the most important wall, starting from the upper area. This is because this area will attract the most attention in the room, so we want the wallpaper to look exceptional here.
"With this process, you will already know where the complete pattern starts and how you can place it. Mark it lightly to have that reference constantly, and you can start installing the wallpaper wherever you prefer. Just remember to keep the start of the pattern in the upper area of the wall."
Use a easel to cut the strips of wallpaper.
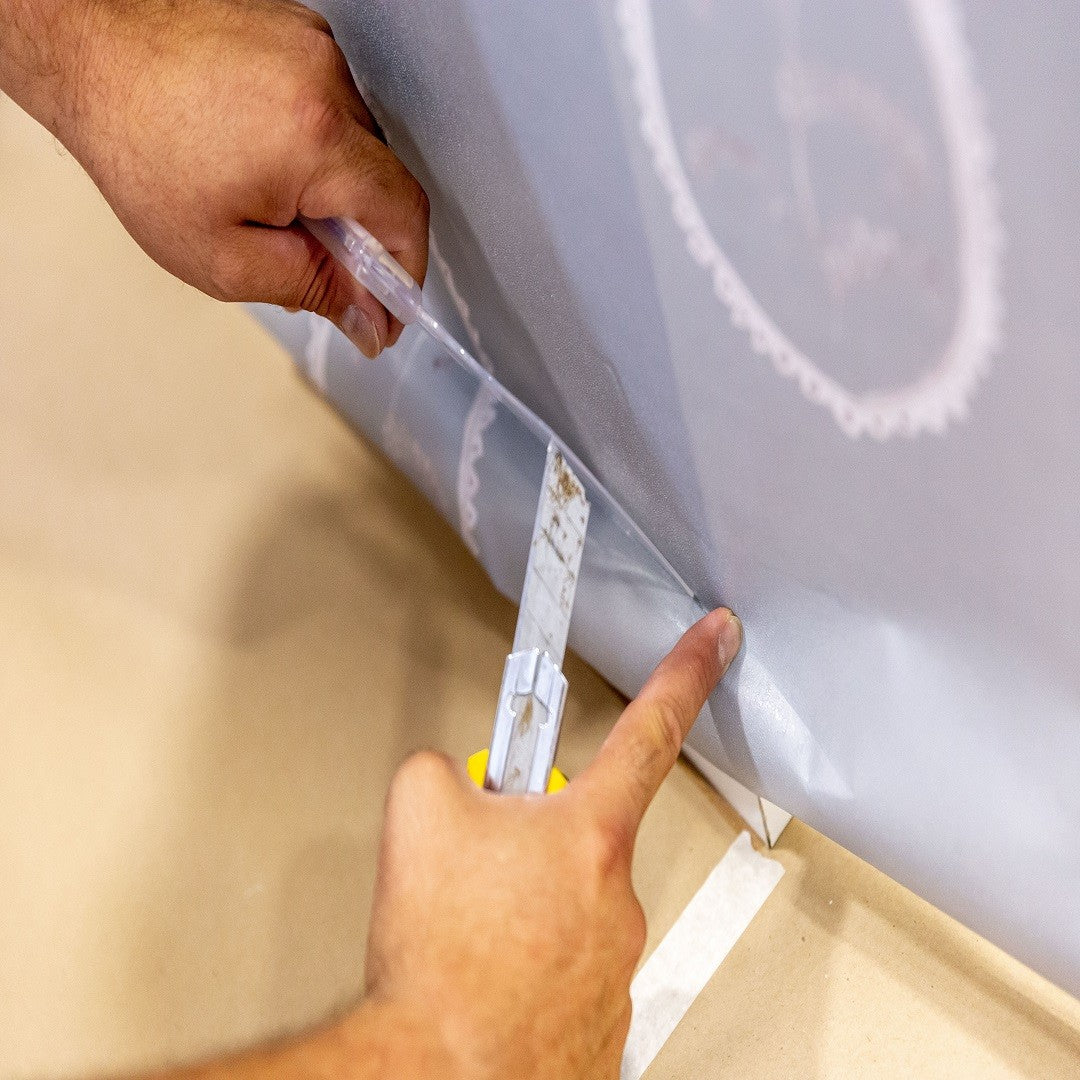
Now that you have everything ready, the time of truth has come. Arm yourself with a pencil, a blade (or even a cutter or large scissors), and, if necessary, some cotton gloves for the more delicate wallpaper. Set your tools on an easel and start the process.
"Develop the wallpaper with the pattern towards you, and remember to mark the measurements by adding a total of ten centimeters to the maximum height of the wall. Pay close attention to the start of the roll, as it does not always begin with the complete pattern. Allow a little margin if it doesn't, without forgetting that extra we mentioned."
With a ruler for wallpaper, or by folding the strip until it matches, make a cut in a perfect straight line. Only then can you ensure that you won't have mistakes when placing it and that the print will be perfect. As you can imagine, for plain papers you won't need to worry about the start of the pattern, but you should still follow the same cutting method.

Pay attention to the repetition pattern to continue
Now that you have the first of the strips cut, it's time to continue with the others for the rest of the wall. To do it the right way, you need to take into account the type of pattern that the wallpaper you have chosen follows, to avoid misalignments in its placement. There are three different formats:
Straight rapport: there are no imbalances in the pattern, since the image remains constant and you will only have to overlap them. They are semi-abstract geometric figures, like houndstooth or paisley.
Straight Rapport: there are no imbalances in the pattern, since the image remains constant and you will only have to overlap them. They are semi-abstract geometric figures, like houndstooth or paisley.
Free Rapport: in this case there will be no complications, since the shape of the pattern has no consequences. For example, when they are vertical colored lines.
Saute Rapport: They are usually large geometric figures, like large polka dots, in which the strips will be equal in a skipped manner (the first, the third and the fifth; the second, fourth and sixth…).
With this, you are more than ready to dive into cutting your first roll of wallpaper and installing it in your new room.